Pi Set Up
The long list of instructions here, when followed in order will result in a raspberry pi running the lastest version of raspbian, that you can operate wirelessly thru another computer. We will also back up the Pi so we have a clone of it. Further instructions on the website will enable you then to turn this base Pi into many different tools.
Equipment
the best place to start is always the official raspberry pi website. heres what they have to say
the equipment we will defiantly need is as follows, it’ll cost you around fifty quid
raspberry pi – i would suggest at least a version 3
power lead -worth getting the official, most problems with raspberry pi’s come from insuffient power- it can cause programs to behave unpredictably
2 memory cards – 32 gigs is good, but no smaller that 16gigs. you will also need a card reader.
Notice i havent listed a moniter,keyboard or mouse, the following set up will set the Pi up in a headless mode, that is you don’t need a monitor , mouse or keyboard. We will use a computer to access the Pi and its desktop, if you want to use the Raspberry Pi as a standard computer with its own screen, you can just plug in a keyboard ,mouse and use the HDMI output to plug into a moniter. There are other things we will need to plug in the pi when we come to make stuff (such as a soundcard,camera,arduino) but these will be detailed when required for a project
Getting it working- Burning a memory card
The raspberry pi brain exists on a memory card. The first job is to burn the operating system on the memory card. This is very simple with the Raspberry PI imager.
download it from here
https://www.raspberrypi.org/software/
and here’s the official video of telling how to burn
Before you go of and burn theres a few settings we should change, so we can connect wirelessly to the raspberry pi and use our own computer to access its desktop.
first with Raspberry Pi imager open before we hold down
control ,shift, x
this will bring up a dialog box, fill it out so it matches this
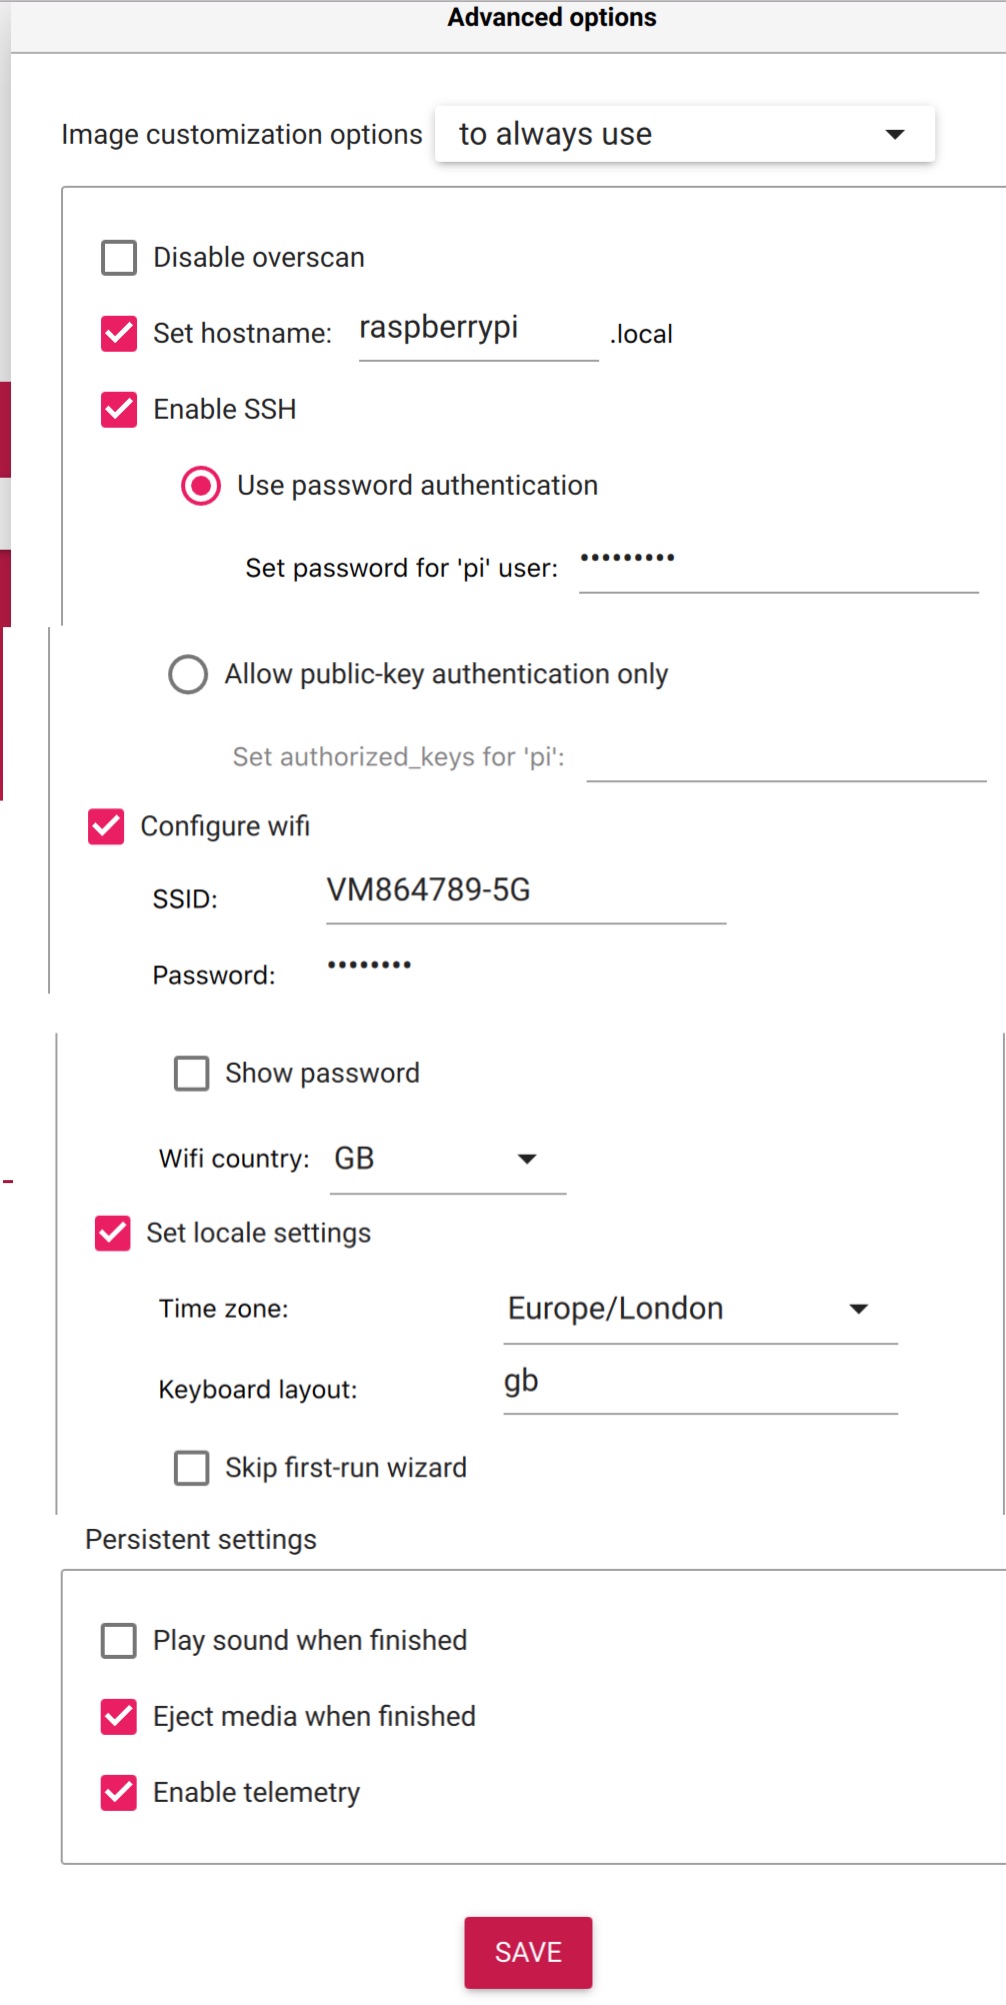
Set password for “pi” user – i have left as the defualt password , raspberry
under the configure wifi spot put your own wifi network details in
press save then burn the card.
First Boot to the Raspberry Pi
when finished place the card in the pi, and power up.
wait for a few minuets, (until the green light stops flashing) , then open up a Terminal window and type
ping raspberrypi.local
this will tell us the IP of raspberry pi (so we can communcate with it wirelessly) you can see on my machine its 192.168.0.35 (to stop it printing numbers press (alt . )

!!!!!!!!!!!!!!!!!!!!!!!!!!!!!!!!!!!!!!!!!!!!!!!!!!!!!!!!!!!!!!!!!!!!!!!!!!!!!!!!!!!!!!!!!!!!!!!!!!!!!!!!!!!!!!!!!!!!!!!!!!!!!!!!!!!!!!!!!!!!!!!!!!!!!!!!!!!!!!!!!!!!
YOU DONT HAVE TO DO THIS NEXT STEP. BUT IF YOU HAVE PROBLEMS CONNECTING TO THE PI OVER THE NEXT STEP, THIS IS WHAT YOU DO!
A bit of housekeeping here. We have to get rid off any old “ssh keys” you might have used communicating with a raspberry before. In the terminal on the mac type
cd
cd .ssh
nano known_hosts
this will bring up a box.Delete the entry for the ip number you’ve just noted down. then save (ctlin X, y , return)

!!!!!!!!!!!!!!!!!!!!!!!!!!!!!!!!!!!!!!!!!!!!!!!!!!!!!!!!!!!!!!!!!!!!!!!!!!!!!!!!!!!!!!!!!!!!!!!!!!!!!!!!!!!!!!!!!!!!!!!!!!!!!!!!!!!!!!!!!!!!!!!!!!!!!!!!!!!!!!!!
next (on a mac) we go to connect to server . for a Pc use putty, here are the instructions
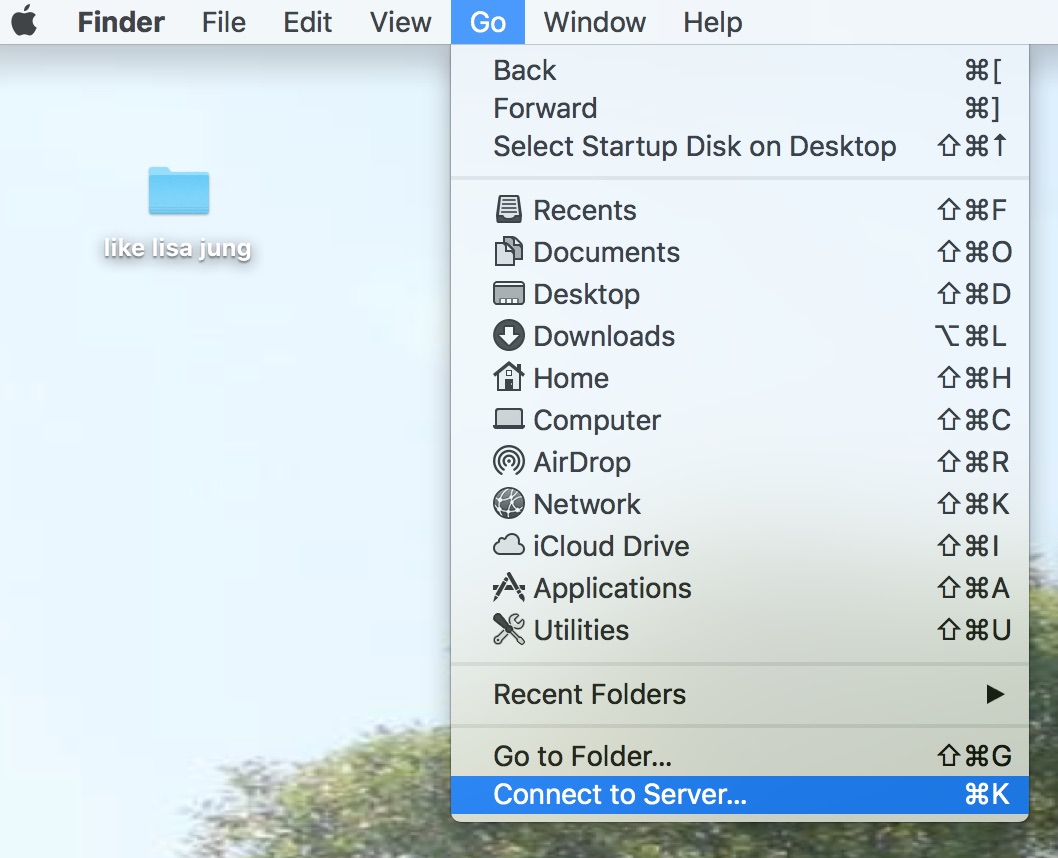
and type in ssh://pi@ YOUR IP NUMER HERE and press connect

both on a mac or windows machine this will then bring up a new terminal window, which asks do you want to join up with the raspberry pi?, type yes, then it will ask for the raspberry pi’s password, which is : raspberry


now it’ll join onto the pi. in the terminal window again type sudo raspi-config and this brings up the raspberry pi configuartion pages.
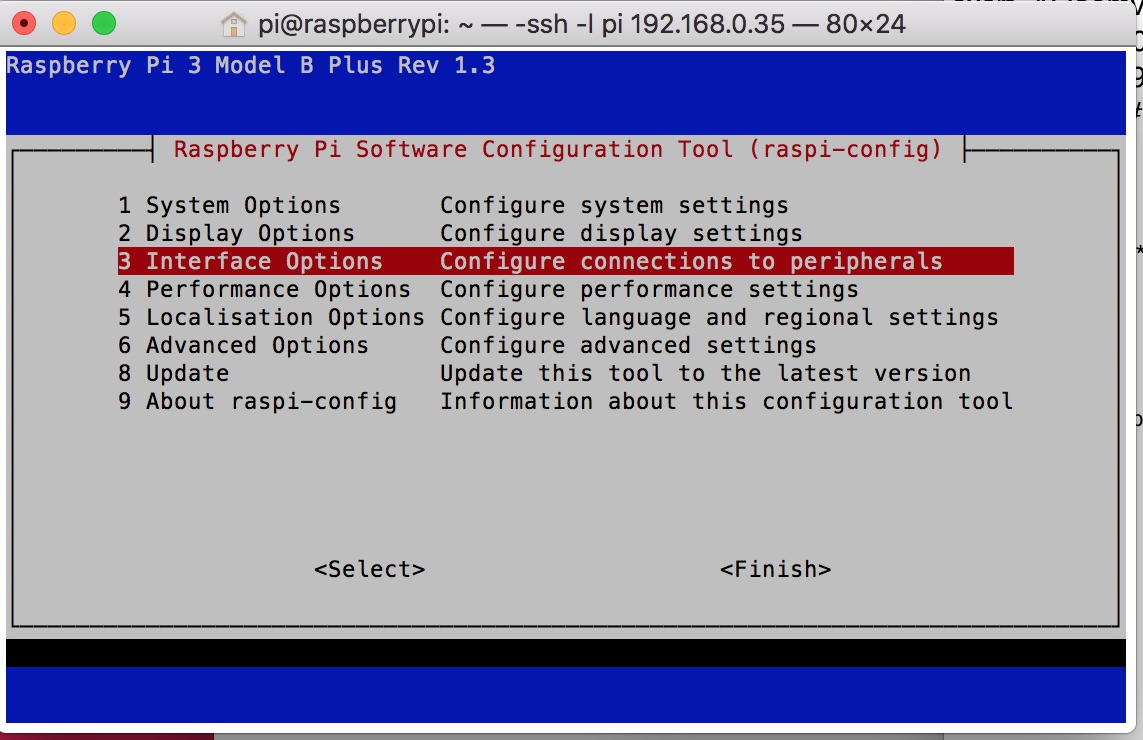
choose number 3 .interface options
the number 3 again , for VNC and enable
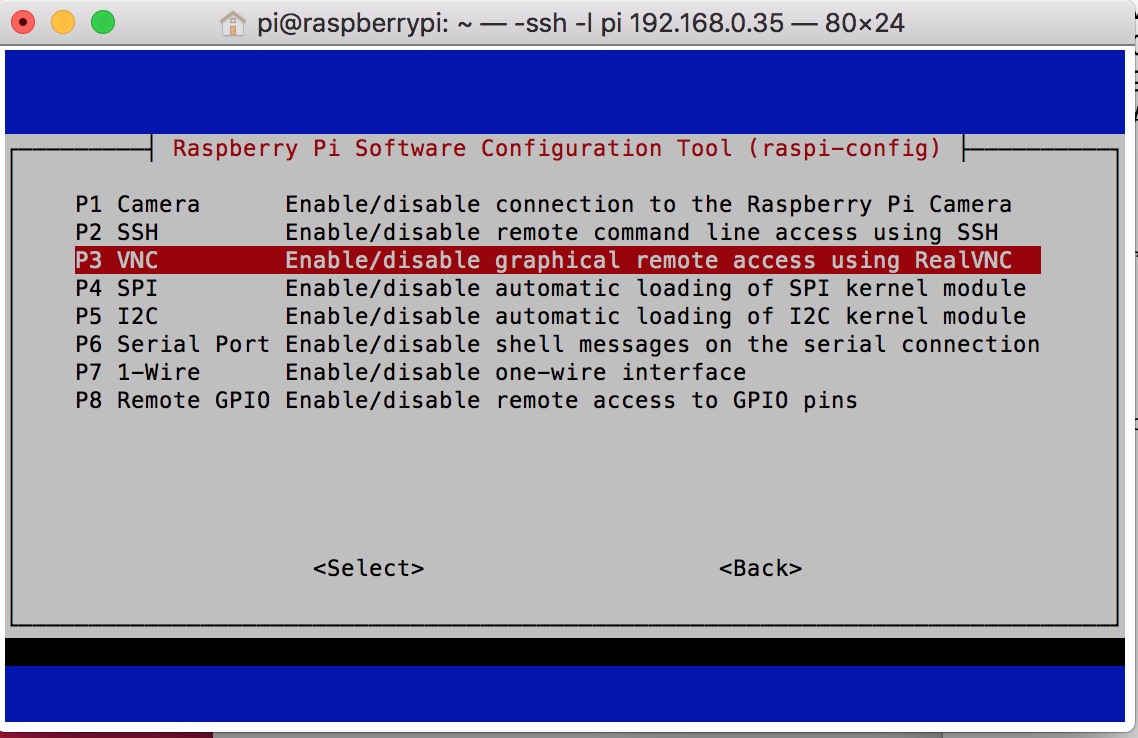
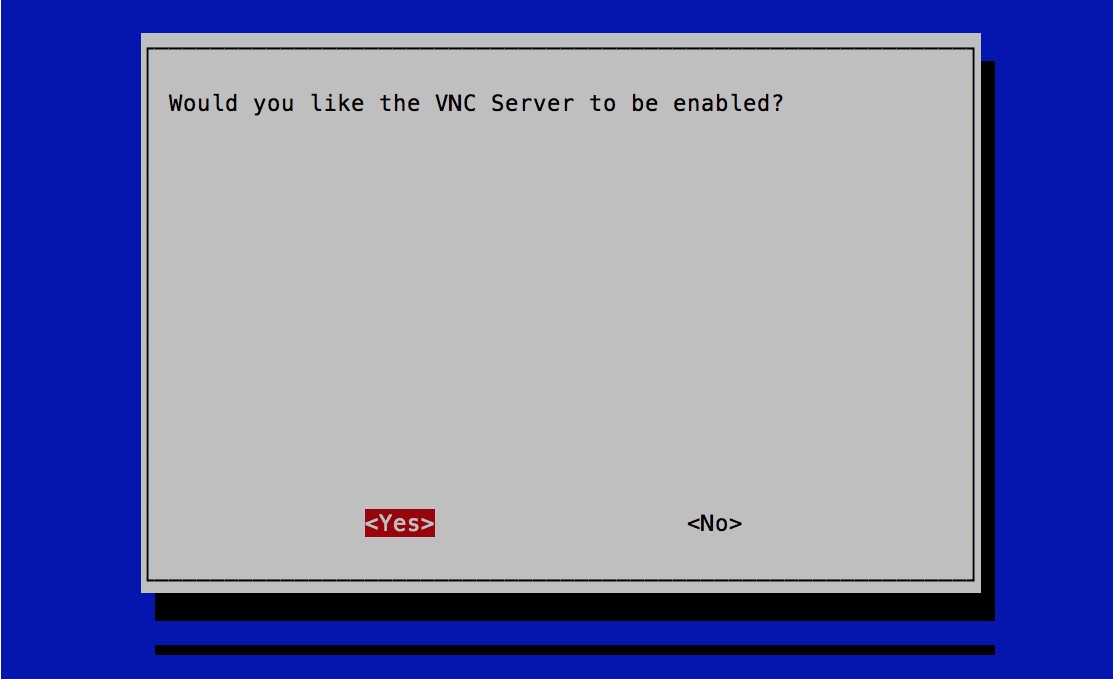
choose <Back> then <Finish>
finally go back to terminal and type
sudo reboot

we’ll wait a while for the pi to boot up again (when the green light stops flashing) and will now join onto the pi with VNC
VNC
download VNC for your computer here
open it and you’ll see this box, type in the pi’s IP number
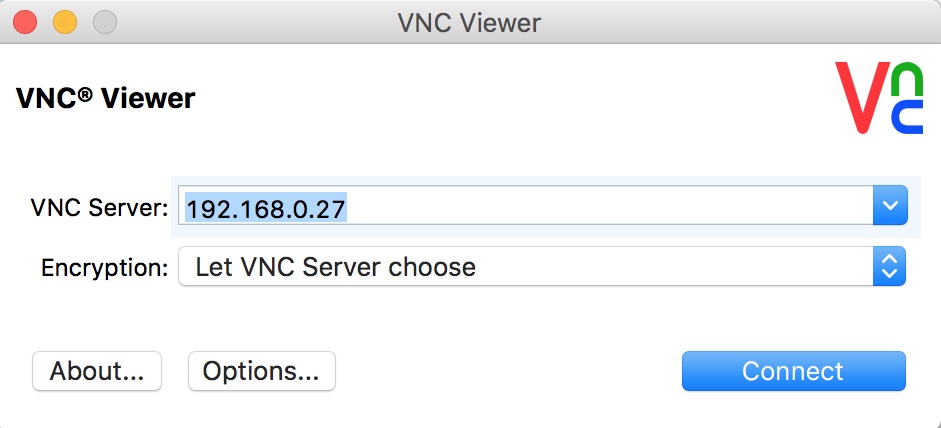
then the username (pi) and the password (raspberry

you will then get this warning, press continue
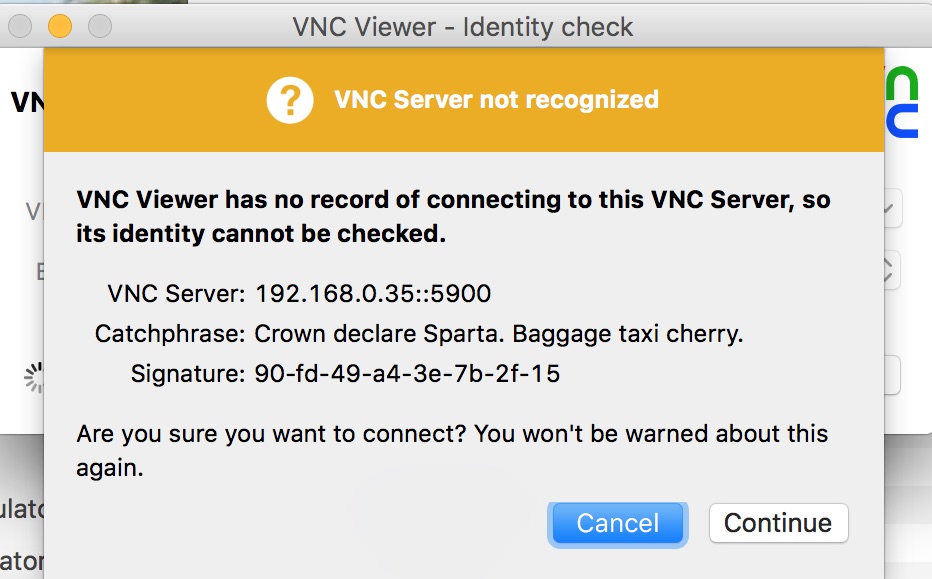
then the raspberry pi desktop will appear in a vnc window! congratulations you’re talking to your pi wirelessly
VNC is a great little program and let you do everything on the pi, but using you normal laptop or computer. You can transfer files over to the pi with it and you can copy and paste from your home computer to the pi (remember the key combinations from a mac to a pi are different,so i always use copy and paste from the drop down menu). For more info about how you can use VNC to transfer files wirelessly between computers go here.
a couple of other housekeeping things, then we’ll copy off the card.
firsts we’ll get rid of the annoying password warning (i never change the user or password from the defualt user pi and password raspberry)
open a terminal window and type
cd /etc/xdg/lxsession/LXDE-pi/
sudo mv sshpwd.sh old_sshpwd.sh
next set the screen resolution to the largest.
go to the raspberry (top left hand corner), go to preferences, go to raspberry pi configuration, then displays, then set resolution

finally we’ll copy the card , if the memory card becomes currupted we’ll have a copy of the original that we can then use instead. A good tip is to get your pi how you want it, then copy the card,it’ll save you a few hours if you ever have to re-install the operating system.
copying off you raspberry pi card
Realy easy this.First attach a memory card reader to one of the pi’s usb slots. Then put in a blank memory card the same size as the one already in the raspberry pi.
Next go to the raspberry (top left hand corner) choose Accessories, then SD Card Copier , which will launch the card copier application.

copy from device – choose the raspberry pi card
copy to device – choose the card in your card reader
press start,ok everything, and in about 10 minuets you’ll have a copy of your card.
there you go!